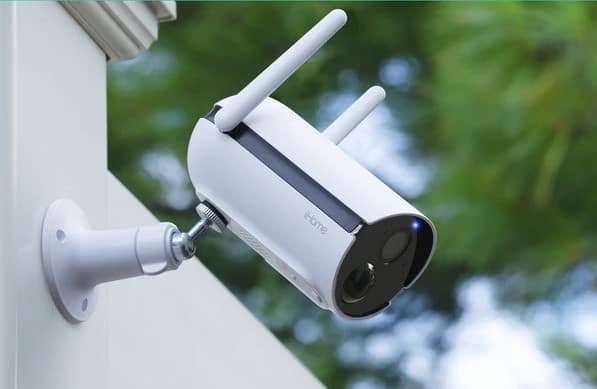
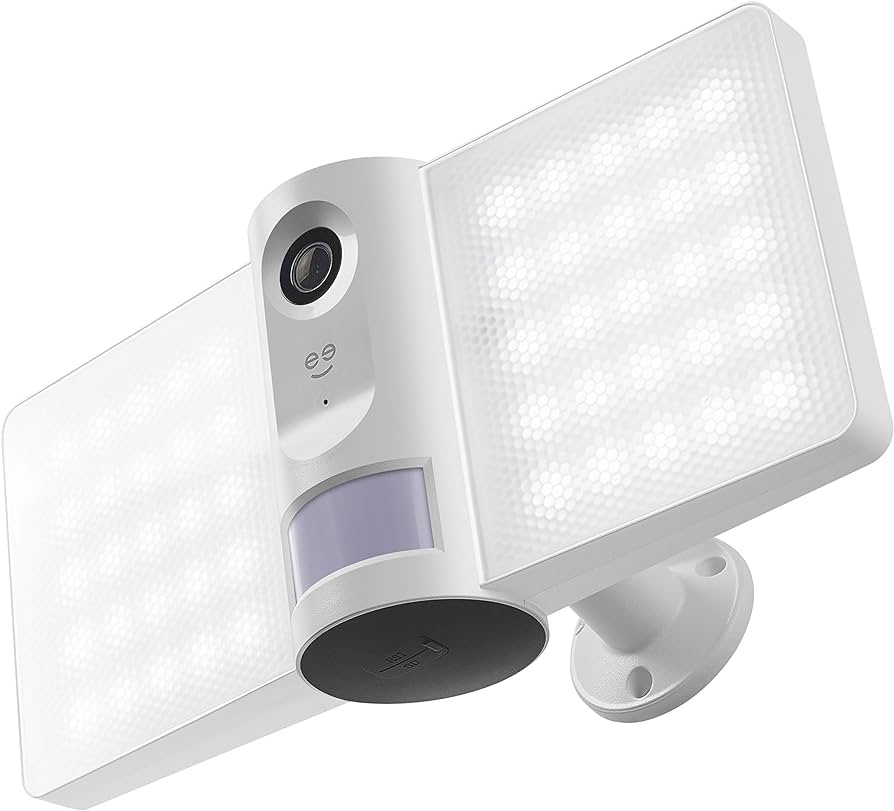
To set up a Geeni camera, ensure a stable internet connection and download the Geeni app on your smartphone. Connect your mobile device to the same network as the camera, power it on, and install the app.
Once installed, follow the on-screen instructions to connect and configure your Geeni camera for use. Introducing a new smart camera to your home can enhance your security and provide peace of mind. Geeni cameras offer a user-friendly and convenient solution to monitor your space remotely.
However, setting up your Geeni camera correctly is crucial to ensure its proper functioning. We will guide you through the Geeni camera setup process, providing step-by-step instructions to get your camera up and running in no time.
Whether you are a tech-savvy individual or a beginner, our instructions will help you navigate the setup process effortlessly. So let’s get started and make sure your Geeni camera is connected and ready to go.
How To Set Up A Geeni Wifi Camera
To set up a Geeni WiFi camera, ensure you have a stable internet connection and download the Geeni app on your smartphone. Connect your mobile device to the same network, power your camera, and install the Geeni app to complete the setup process.
To set up a Geeni WiFi camera, follow these steps:
1. Ensure that you have a stable internet connection.
2. Download and install the Geeni app on your smartphone from the app store.
3. Connect your mobile device to the same network that you want to connect your camera to.
4. Power on your Geeni camera by plugging it into a stable power outlet.
5. Open the Geeni app and follow the on-screen instructions to connect and set up your camera.
By following these steps, you will be able to successfully set up your Geeni WiFi camera and start using it to monitor your home or office.
Steps To Connect Geeni Camera To Wifi
To set up a Geeni WiFi camera, first, ensure that you have a stable internet connection. Then, plug the camera into a stable power outlet using a USB cable. The LED light on the camera will light up solid blue, indicating that it is ready for setup.
Next, download and install the Geeni app on your smartphone or tablet. Once the app is installed, open it and follow the on-screen instructions to create a new account or log in to your existing Geeni account.
Once you are logged in, tap on the “+” icon on the app’s main screen to add a new device. Select “Wi-Fi Camera” from the list of devices and follow the app’s prompts to connect the camera to your Wi-Fi network.
Make sure that you are in an area with a strong Wi-Fi signal and that you have entered the correct Wi-Fi password. If you are still experiencing issues with connecting the camera, try force closing the Geeni app and reopening it before attempting the pairing process again.
Following these steps will allow you to successfully connect your Geeni camera to your Wi-Fi network and begin using it to monitor your home or office remotely.
How To Connect Geeni Camera To New Wifi
To connect your Geeni camera to a new WiFi network, ensure you have a stable internet connection, download and install the Geeni app, and follow the step-by-step instructions provided. Power your camera and connect your mobile device to the same network to complete the setup process easily.
To connect your Geeni camera to a new Wi-Fi network, follow these steps:
1. Access the Geeni app on your smartphone or tablet.
2. Click on “Devices” in the menu.
3. Select “Wi-Fi Camera” from the list of devices.
4. Check the camera indicator to ensure it is in the appropriate connection status.
Make sure you have a stable internet connection before setting up the Geeni camera. Additionally, ensure that your mobile device is connected to the same network as the camera. Power on your camera and install the Geeni app on your device. Now you can connect and set up your Geeni camera easily.
Troubleshooting: Geeni Camera Not Connecting
To troubleshoot if your Geeni camera is not connecting, there are a few steps you can follow:
- Check for a strong Wi-Fi signal in the area where the camera is located.
- Ensure that your mobile device is connected to the desired Wi-Fi network.
- Double-check the Wi-Fi password to make sure it is correct.
- If the issue persists, try force closing the Geeni app and then re-pairing the camera.
Following these steps should help resolve any connectivity issues you may be experiencing with your Geeni camera.
Adding Another Camera To Geeni App On Android Devices
To add another camera to the Geeni app on your Android device, follow these instructions:
- Access the Geeni app on your Android device
- Follow the instructions for adding a new device
- Select the “Wi-Fi Camera” option
- Complete the setup process
To set up a Geeni WiFi camera, make sure you have a stable internet connection. Download and install the Geeni app on your smartphone. Connect your mobile device to the same network as the camera. Power on your camera and follow the in-app instructions to install it.
Alternatively, if you don’t have the QR code, go to the Geeni app, click on Devices, then click on ‘Wifi Camera.’ Check the camera to see that the indicator is blinking rapidly.
Follow the app’s instructions to connect the camera to your Wi-Fi network. After successful setup, you can control and monitor the camera through the Geeni app.
Compatible Apps For Geeni Cameras
When setting up Geeni cameras, make sure you have a stable internet connection. Download and install the Geeni app on your smartphone and connect your camera to the same network. Follow the step-by-step instructions to complete the setup process.
Geeni app is compatible with Geeni products and cameras. It allows you to easily set up and connect your Geeni WiFi camera to your smartphone or tablet. To get started, make sure you have a stable internet connection and download the Geeni app from your app store.
Once installed, power on your Geeni camera and follow the app’s instructions to connect it to your WiFi network. It’s important to note that the iHome app is not compatible with Geeni cameras, so make sure to use the Geeni app for all your camera setup needs.
By using the Geeni app, you can conveniently view live camera feeds, adjust camera settings, and even set up smart features like motion detection and alerts. So, get your Geeni camera set up and start monitoring your home or office with ease.
Geeni Camera Setup Without Qr Code
To set up your Geeni camera without the QR code, follow these simple steps:
- Open the Geeni app on your smartphone.
- Click on “Devices” in the bottom menu.
- Select “WiFi Camera” from the list of devices.
- Follow the on-screen instructions to proceed with the setup process.
Make sure you have a stable internet connection before starting the setup. If you encounter any issues, ensure that you are in an area with a strong Wi-Fi signal. Also, double-check that your mobile device is connected to the Wi-Fi network you want to connect your camera to, and that you have entered the correct Wi-Fi password.
If the camera doesn’t pair initially, you can try force closing the app and then reopening it to re-pair the camera. If you still have trouble, refer to the Geeni camera manual for further troubleshooting steps.

Credit: www.security.org
Frequently Asked Questions On Geeni Camera Setup
Why Is My Geeni Camera Not Connecting?
If your Geeni camera is not connecting, first check that you have a strong Wi-Fi signal. Make sure your mobile device is on the same Wi-Fi network you want your camera connected to. Double-check that you’ve entered the correct Wi-Fi password.
If the issue persists, try force closing the app and re-pairing the camera.
How Do I Add A Device To Geeni?
To add a device to Geeni, make sure you have a stable internet connection. Download and install the Geeni app on your smartphone. Connect your device to the same network as the Geeni device. Open the Geeni app and follow the prompts to add the device to your account.
How Do I Connect My Geeni Camera To Easy Mode?
To connect your Geeni camera to easy mode, follow these steps:
1. Download and install the Geeni app on your smartphone.
2. Ensure a stable internet connection.
3. Power on your Geeni camera.
4. Connect your mobile device to the same Wi-Fi network.
5. Open the Geeni app and tap on “Wi-Fi Camera. ”
6. Enter your Wi-Fi password and tap “Next Step. ”
7. Look for the QR mode in the top right corner and tap on it.
8. Select “Easy Mode” from the options.
9. Your Geeni camera will now connect to easy mode.
That’s it! Your Geeni camera is now connected to easy mode. Enjoy!
What Apps Work With Geeni Cameras?
Geeni cameras work with the Geeni app, but not the iHome app.
Conclusion
To set up your Geeni camera, make sure you have a stable internet connection and download the Geeni app on your smartphone. Connect your mobile device to the same network as the camera, power it on, and install the Geeni app.
Follow the step-by-step instructions provided in this guide to connect your camera to WiFi and access its features easily. Make sure to check for a strong WiFi signal and enter the correct password for a smooth setup process. For troubleshooting, refer to the Geeni support page.

